How To Repair Cracks In Concrete Patio
How to repair cracks in concrete patios is a common question for homeowners. A cracked patio not only detracts from the aesthetic appeal of your outdoor space but can also compromise its structural integrity. Understanding the causes of these cracks, from settling foundations to freeze-thaw cycles, is the first step toward effective repair. This guide will walk you through assessing the damage, selecting the appropriate repair method, and restoring your patio to its former glory, providing a durable and attractive surface for years. We’ll cover everything from simple surface cracks to more significant structural issues, ensuring you have the knowledge to tackle the job confidently.
This comprehensive guide provides a step-by-step approach to repairing cracks in your concrete patio, covering various crack types and repair methods. We’ll explore the importance of proper surface preparation, the application of different repair materials, and the crucial curing process. Furthermore, we’ll delve into preventative maintenance strategies to help you avoid future cracking and extend the lifespan of your patio.
Assessing the Damage: How To Repair Cracks In Concrete Patio
A thorough assessment of the cracks is crucial before initiating any repair. This involves identifying the crack type, understanding contributing factors, and evaluating the damage’s severity. This ensures you choose the appropriate repair method and materials.
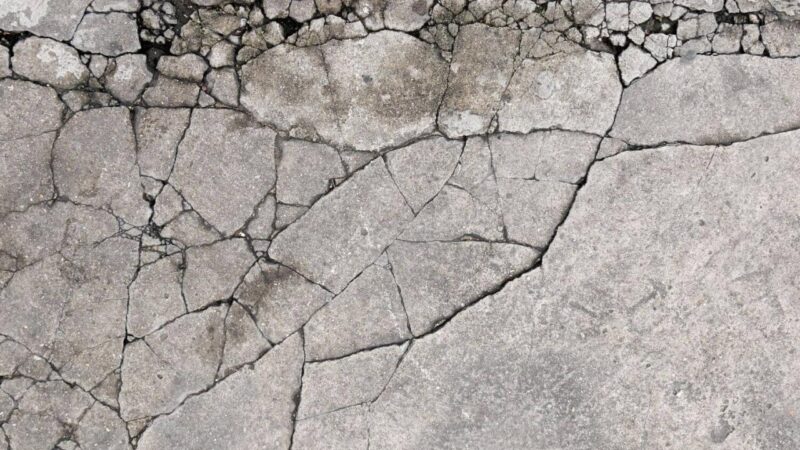
Types of Concrete Patio Cracks
Concrete patio cracks manifest in various forms, each indicating different underlying issues. Hairline cracks, typically thin and less than 1/8 inch wide, often result from minor settling or shrinkage. Larger cracks, exceeding 1/8 inch, may signify more significant structural problems. Cracks that are wide, deep, or accompanied by displacement of concrete sections often point to foundation issues or severe stress on the patio.
Factors Contributing to Concrete Patio Cracking
Several factors contribute to concrete patio cracking. These include poor initial concrete mixing and placement, inadequate base preparation, freeze-thaw cycles (water expanding as it freezes within the concrete), soil movement or settling, tree root growth, and heavy loads placed on the patio.
Inspecting a Cracked Patio
A detailed inspection is essential to determine the extent of the damage. Measure the crack’s length, width, and depth using a ruler and a crack gauge (or a similar tool for depth measurement). Note the crack’s pattern (straight, curved, branching) and any accompanying signs of spalling (chipping) or concrete displacement. Photograph the cracks for reference.
Crack Severity Checklist
This checklist aids in evaluating the severity of concrete cracks and determining the appropriate repair method.
- Crack Width: Less than 1/8 inch (minor); 1/8 inch to 1/2 inch (moderate); Greater than 1/2 inch (severe)
- Crack Depth: Surface crack (minor); Penetrating more than 1 inch (moderate); Penetrating more than 2 inches (severe)
- Crack Pattern: Hairline cracks (minor); Wide, spreading cracks (moderate); Cracks with significant displacement (severe)
- Accompanying Damage: No spalling or displacement (minor); Minor spalling (moderate); Significant spalling or displacement (severe)
Choosing the Right Repair Method

Source: sequoiastonescapes.com
Selecting the appropriate repair method depends on the crack’s characteristics and severity. Several options exist, each with its advantages and disadvantages.
Comparison of Concrete Repair Methods
Epoxy injection is ideal for deep, structural cracks, offering durable repair. Patching with the concrete patching compound is suitable for smaller cracks and surface damage. Caulking is best for minor surface cracks, providing a watertight seal but less structural integrity.
Decision Tree for Repair Method Selection
This decision tree guides the selection of the appropriate repair method based on crack characteristics.
- Is the crack less than 1/8 inch wide and only on the surface? → Use caulk.
- Is the crack wider than 1/8 inch but less than 1/2 inch wide? → Consider patching with a concrete patching compound.
- Is the crack wider than 1/2 inch or very deep? → Use epoxy injection.
Cost and Material Comparison Table
| Repair Method | Cost (Estimate) | Materials | Labor |
|---|---|---|---|
| Caulking | $10-$50 | Caulk, caulking gun | Low |
| Patching | $50-$200 | Patching compound, trowel, mixing tools | Moderate |
| Epoxy Injection | $200-$1000+ | Epoxy resin, injection pump, mixing cups | High |
Preparing the Surface
Proper surface preparation is crucial for a successful repair. This involves cleaning, removing loose concrete, and widening cracks to ensure proper penetration of repair materials.
Cleaning and Preparing the Cracked Area
Begin by thoroughly cleaning the cracked area using a wire brush, stiff broom, and pressure washer to remove dirt, debris, dust, and loose concrete. Ensure the surface is dry before applying any repair material. For deeper cracks, use a chisel or grinder to carefully remove any loose or crumbling concrete to a sound base.
Widening Cracks
For epoxy injection and patching, it’s essential to widen the cracks slightly to create a channel for the repair material to penetrate. Use a chisel or grinder to carefully widen the crack, creating a V-shaped groove. This increases the surface area for adhesion.
Creating a Clean, Dry Surface

Source: ytimg.com
After cleaning and widening, use a shop vacuum or compressed air to remove any remaining dust and debris from the crack. Ensure the surface is completely dry before proceeding to apply the repair material. This ensures proper adhesion and prevents moisture from weakening the repair.
Applying the Repair Material
The application method varies depending on the chosen repair material and crack severity. Follow the manufacturer’s instructions carefully for best results.
Epoxy Injection for Deep Cracks
- Illustration: A diagram showing the injection process, including the placement of injection ports and the flow of epoxy resin into the crack. The diagram shows a cross-section of the crack and surrounding concrete, with arrows indicating the direction of epoxy flow.
- Drill small holes along the crack at intervals recommended by the manufacturer.
- Insert injection ports into the holes.
- Mix the epoxy resin according to the manufacturer’s instructions.
- Inject the epoxy resin into the crack until it starts to seep out of the crack.
- Remove the injection ports once the epoxy has cured.
Patching Cracks with Concrete Patching Compound
- Illustration: A step-by-step illustration showing the preparation of the patching compound, application to the crack, smoothing, and curing.
- Mix the patching compound according to the manufacturer’s instructions.
- Apply the patching compound to the crack, filling it.
- Use a trowel to smooth the surface, ensuring it’s level with the surrounding concrete.
- Allow the patching compound to cure completely.
Applying Caulk to Surface Cracks
- Illustration: A close-up illustration showing the application of caulk to a surface crack, including the use of a caulking gun and smoothing the caulk with a wet finger.
- Apply a bead of caulk to the crack using a caulking gun.
- Smooth the caulk using a wet finger or a smoothing tool.
- Allow the caulk to cure completely.
Curing and Finishing

Source: ytimg.com
Proper curing is essential for achieving a durable repair. This involves protecting the repaired area from environmental factors and allowing the repair material to fully harden.
The Curing Process
The curing process allows the repair material to gain strength and durability. The curing time varies depending on the material used and environmental conditions. Follow the manufacturer’s instructions for the specific curing time and conditions. Maintaining proper moisture levels during curing is particularly important for concrete-based repair materials.
Protecting the Repaired Area
Protect the repaired area from direct sunlight, rain, and freezing temperatures during the curing period. Cover the repaired area with a tarp or plastic sheeting to maintain moisture and prevent cracking due to rapid drying. For epoxy injections, ensure the area is kept shaded to prevent premature curing.
Smoothing and Finishing
Once the repair material has cured, use fine-grit sandpaper or a grinding tool to smooth any rough edges or uneven surfaces. Apply a concrete sealant to protect the repaired area from moisture and staining. Blend the repaired area with the surrounding concrete using appropriate color-matching techniques.
Cleaning Up, How to repair cracks in concrete patio
Clean up any excess materials immediately after application. Dispose of waste materials properly according to local regulations. Use appropriate personal protective equipment (PPE) during cleanup to prevent exposure to harmful chemicals.
Preventative Maintenance
Regular maintenance helps prevent future cracking and extends the lifespan of your concrete patio. This includes addressing common causes of cracking and protecting the patio from environmental factors.
Preventing Concrete Patio Cracking
Preventative measures include proper grading to ensure adequate drainage, sealing the concrete to protect it from moisture, avoiding placing heavy loads in concentrated areas, and addressing tree root intrusion. Regular inspection and timely repair of minor cracks can also prevent more extensive damage.
Protection from Freeze-Thaw Cycles
Freeze-thaw cycles are a major contributor to concrete cracking. Sealing the concrete helps prevent water from penetrating and freezing within the concrete. Proper drainage also minimizes water accumulation on the surface.
Regular Cleaning and Sealing
Regular cleaning removes dirt, debris, and other contaminants that can damage the concrete. Sealing the concrete every 2-3 years helps protect it from moisture, chemicals, and UV damage, significantly extending its lifespan.
Maintenance Schedule

Source: pinimg.com
| Task | Frequency |
|---|---|
| Cleaning | As needed, at least twice a year |
| Inspection for cracks | Annually |
| Sealing | Every 2-3 years |
| Repairing cracks | As needed |
FAQ
What type of sealant is best for preventing future cracks?
Acrylic sealers are a popular and effective choice for concrete patios, offering good protection against water damage and freeze-thaw cycles. Always choose a sealant specifically designed for concrete.
How long does the repair process typically take?
The time required depends on the size and severity of the cracks, as well as the chosen repair method. Smaller cracks can be repaired in a few hours, while larger, more complex repairs may take a day or more, including curing time.
Can I repair the cracks myself, or should I hire a professional?
Minor surface cracks can often be repaired by a homeowner with basic DIY skills. However, for extensive or structural cracks, it’s best to consult a professional concrete contractor to ensure a proper and lasting repair.
What tools will I need for this repair?
Necessary tools vary depending on the repair method but may include a wire brush, chisel, hammer, mixing bucket, trowel, and possibly a caulking gun or epoxy injection system.
What should I do if the crack is widening or showing signs of further damage?
This indicates a more serious structural issue. Contact a structural engineer or concrete contractor immediately for a professional assessment and repair.
Comments are closed.