Cost To Have Pavers Installed
The cost to have pavers installed is a question many homeowners ponder before embarking on a landscaping project. Transforming a drab yard into a stunning outdoor space with pavers requires careful planning and budgeting. This guide delves into the various factors influencing the final cost, providing a clear understanding of what to expect during each stage of the process, from initial design and material selection to installation and potential hidden expenses. We’ll explore different paver types, installation techniques, and cost-saving strategies to help you make informed decisions and achieve your dream outdoor oasis within your budget.
Understanding the cost breakdown is crucial for successful project management. This involves analyzing material costs (brick, concrete, natural stone, etc.), labor rates based on location and installer experience, and accounting for unforeseen expenses like permits and site preparation. We will provide practical examples, cost comparisons, and step-by-step guidance to empower you with the knowledge to accurately estimate your project’s overall expense.
Factors Affecting Paver Installation Costs
Several key factors significantly influence the overall cost of a paver installation project. Understanding these factors allows for more accurate budgeting and realistic expectations. This section will detail the impact of material selection, project scope, and labor costs on the final price.
Material Choices and Cost
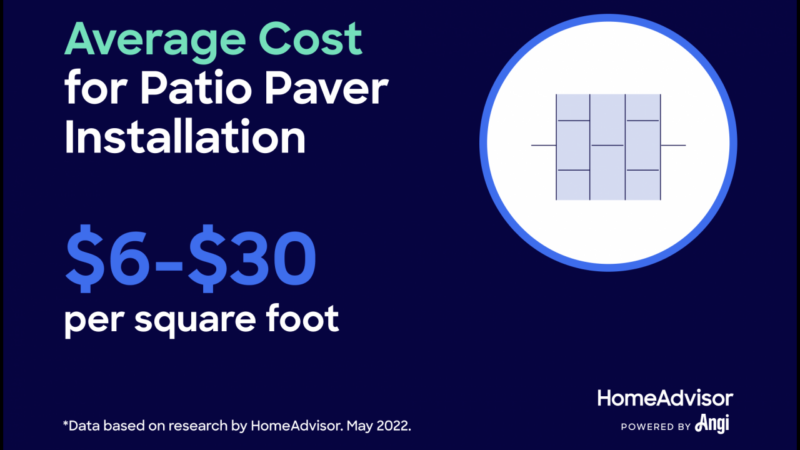
The type of paver material chosen dramatically impacts the project’s cost. Brick pavers, while aesthetically pleasing and durable, generally fall in the mid-range price bracket. Concrete pavers offer a more budget-friendly option, providing a balance between cost and longevity. Natural stone pavers, such as granite or slate, represent the most expensive choice, offering unparalleled beauty and durability but commanding a significantly higher price tag. The cost differences stem from material sourcing, manufacturing processes, and the inherent value associated with each material type.
Project Size and Scope

Source: ctfassets.net
The size and complexity of the project directly correlate with the total cost. A small patio installation will naturally cost less than a large driveway or extensive walkway project. Furthermore, intricate designs, curved edges, or the inclusion of special features like borders or inlays add to the labor intensity and, consequently, the overall expense. Larger projects necessitate more materials, labor hours, and potentially specialized equipment, leading to higher costs.
Labor Costs and Installer Experience
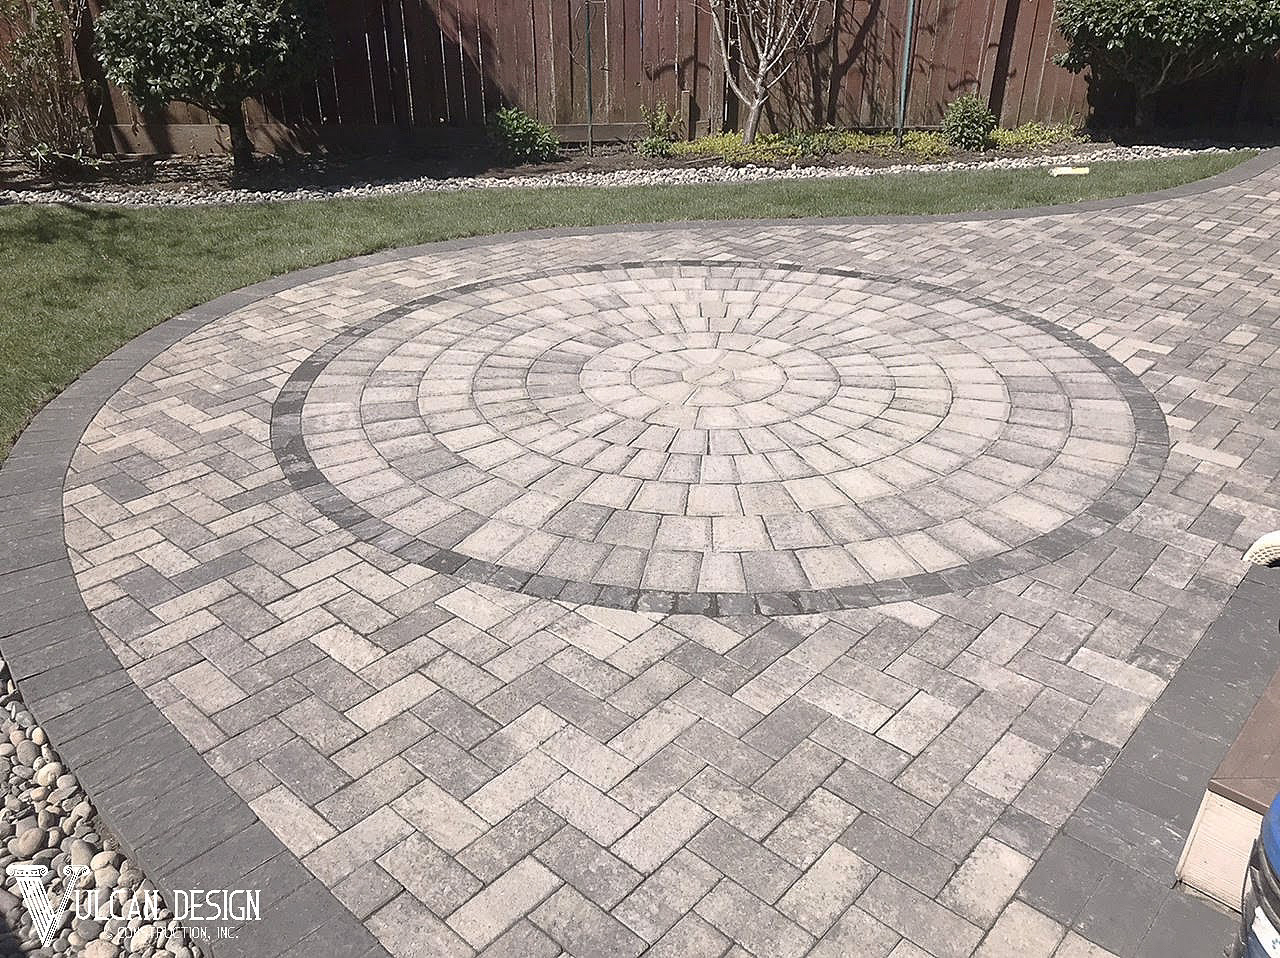
Source: vulcandc.com
Labor costs are a substantial component of the total project expense. Geographic location plays a crucial role; labor rates in metropolitan areas are typically higher than in rural regions. The installer’s experience and reputation also influence pricing. Experienced, reputable installers command higher rates due to their expertise, efficiency, and the assurance of quality workmanship. While a less experienced installer might offer lower hourly rates, the potential for errors or delays could ultimately increase the overall project cost.
Paver Material Cost Comparison, Cost to have pavers installed
| Material | Price per Square Foot | Installation Cost per Square Foot | Total Cost per Square Foot |
|---|---|---|---|
| Concrete Pavers | $2 – $5 | $5 – $10 | $7 – $15 |
| Brick Pavers | $6 – $12 | $7 – $12 | $13 – $24 |
| Natural Stone Pavers | $10 – $30+ | $10 – $20+ | $20 – $50+ |
Note: These prices are estimates and can vary based on location, material quality, and market conditions.
Breaking Down the Installation Process
A typical paver installation involves a series of meticulous steps, each crucial to the project’s success and longevity. Proper site preparation forms the foundation for a durable and aesthetically pleasing installation. Understanding the process and its components allows for better project management and cost estimation.
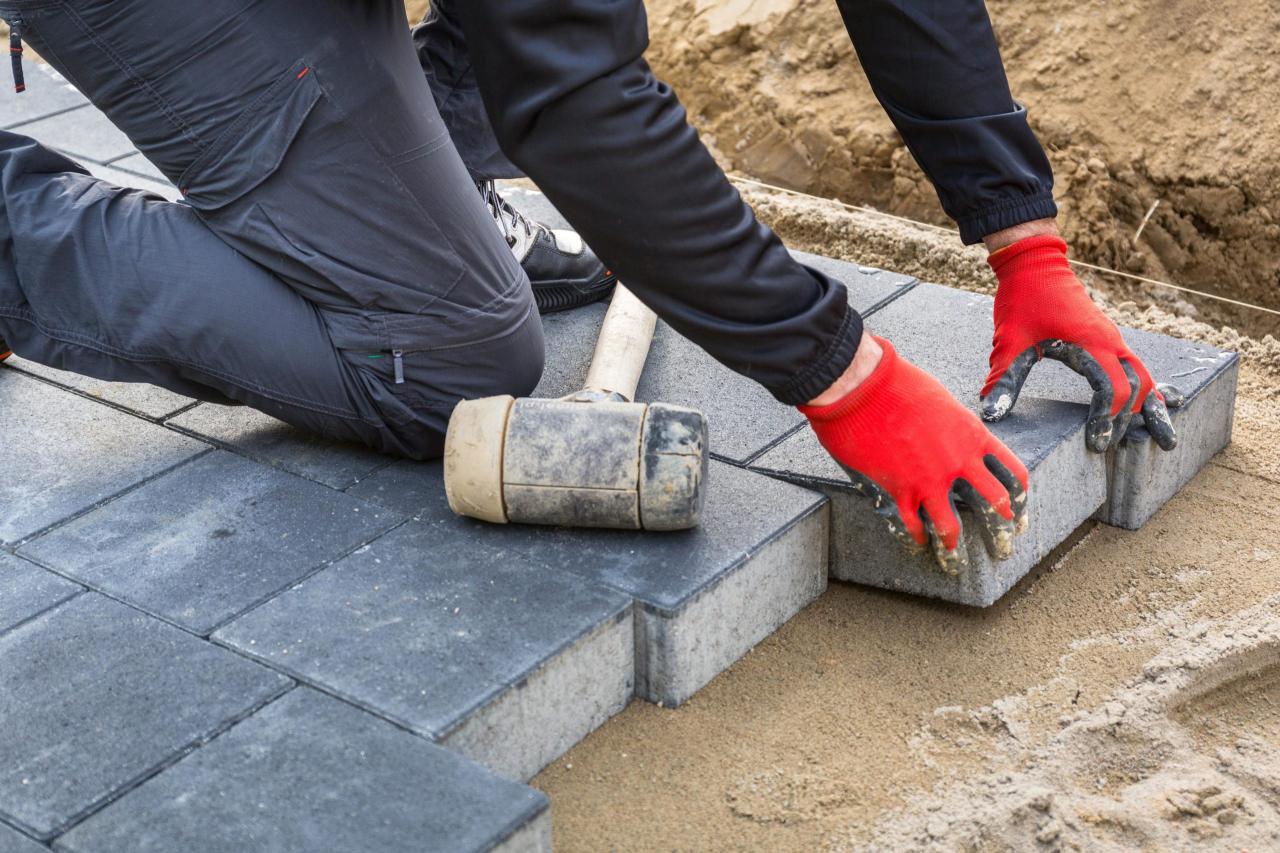
Step-by-Step Paver Installation
Source: paversexperts.com
- Site Preparation: This involves excavation, grading, and compacting the base material to create a stable and level surface. Proper base preparation is essential to prevent settling and ensure the pavers’ longevity.
- Base Installation: A layer of compacted gravel or other base material is laid and leveled to provide drainage and support for the pavers.
- Edging Installation: Edging is installed to contain the pavers and prevent them from shifting or spreading.
- Paver Laying: Pavers are carefully laid according to the chosen pattern, ensuring consistent spacing and alignment.
- Compaction: The installed pavers are compacted to ensure stability and prevent settling.
- Joint Sanding: Joint sand is swept into the gaps between pavers to lock them in place and prevent weed growth.
- Final Cleaning: The area is cleaned to remove any excess sand or debris.
Importance of Site Preparation
Source: com.au
Site preparation is paramount. A poorly prepared base can lead to settling, uneven surfaces, and paver damage. This phase requires careful excavation, grading, and compaction to ensure a stable foundation for the pavers. Any compromises in this stage can significantly impact the project’s lifespan and aesthetics.
Paver Laying Methods
Various methods exist for laying pavers, each impacting the final look and potentially the cost. Common patterns include running bond, herringbone, basketweave, and others. The chosen pattern can influence the amount of material needed and the complexity of the installation process, thus affecting labor costs.
Tools and Equipment for Paver Installation

Source: porch.com
- Excavator or shovel
- Compactor
- Level
- Measuring tape
- String line
- Wheelbarrow
- Edging tools
- Rubber mallet
- Joint sand
- Broom
Additional Costs to Consider: Cost To Have Pavers Installed
Beyond the primary costs of materials and labor, several additional expenses can arise during a paver installation project. These hidden costs can significantly impact the overall budget if not properly accounted for. Careful planning and upfront research can help mitigate unexpected expenses.
Potential Hidden Costs
Permits are often required for larger projects, adding to the overall cost. Disposal fees for excavated materials can also be substantial, particularly if the soil requires special handling or disposal. Unexpected obstacles, such as underground utilities or difficult terrain, can necessitate additional work and increase expenses. These unforeseen complications can significantly impact the final cost if not properly addressed during the planning phase.
Professional vs. DIY Installation
Hiring a professional installer offers the advantage of expertise, efficiency, and warranty protection. While DIY installation can save on labor costs, it requires significant time, skill, and the potential for errors that could lead to increased expenses in the long run. Weighing the cost of professional installation against the potential risks and time commitment of DIY is crucial.
Additional Cost Breakdown
| Cost Item | Likelihood | Minimum Cost | Maximum Cost |
|---|---|---|---|
| Permits | High (for larger projects) | $100 | $500+ |
| Disposal Fees | Medium | $50 | $300+ |
| Unexpected Obstacles | Low to Medium | $100 | $1000+ |
Note: These costs are estimates and can vary significantly depending on location and project specifics.
Estimating the Total Cost
Accurately estimating the total cost of a paver installation project requires careful consideration of all factors discussed previously. Obtaining multiple quotes from reputable contractors is crucial to ensure competitive pricing and informed decision-making.
Cost Calculation and Examples
A reasonable estimate involves calculating the total area to be paved, determining the cost per square foot of the chosen material, adding labor costs, and factoring in potential additional expenses. For example, a 200 sq ft patio using concrete pavers might cost between $1400 and $3000, while a similar-sized patio using natural stone could range from $4000 to $10,000 or more. These are broad ranges, and accurate estimates require detailed quotes from contractors.
Obtaining Multiple Quotes
Requesting multiple quotes from different contractors is essential. Compare quotes based on materials, labor costs, project timelines, and warranties. Thoroughly review each quote’s details before making a final decision. Don’t solely focus on the lowest price; consider the contractor’s experience, reputation, and the overall value offered.
Hypothetical Project Cost Breakdown
Consider a 300 sq ft driveway project using brick pavers. Assuming a material cost of $10 per sq ft, an installation cost of $8 per sq ft, and potential additional costs of $500 for permits and disposal, the total estimated cost could range from $5300 to $6500, depending on the contractor and any unforeseen circumstances.
Visual Representations of Paver Installations
The visual impact of a paver installation is significant, influencing the overall aesthetic appeal of a property. The choice of materials, patterns, and design techniques all contribute to the final look and feel. This section explores the visual differences and cost implications of high-end and low-cost installations.
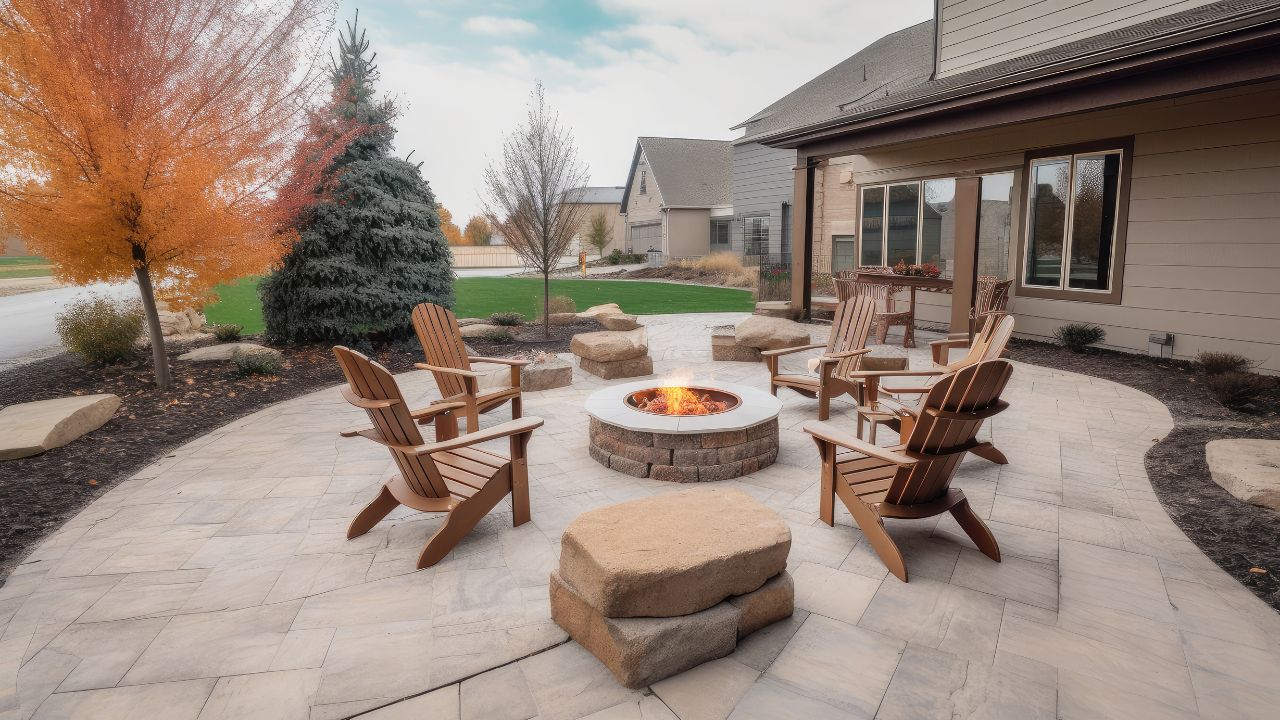
High-End Paver Installation
Imagine a grand entranceway featuring large-format natural stone pavers in a sophisticated herringbone pattern. The pavers are meticulously laid, with perfectly aligned edges and minimal grout lines. Accentuating the design are meticulously placed borders of contrasting stone, creating a stunning visual effect. This high-end installation utilizes premium materials and skilled craftsmanship, resulting in a luxurious and visually impressive outcome, reflecting a substantial investment in both materials and labor.
Low-Cost Paver Installation
A budget-friendly option might utilize standard concrete pavers in a simple running bond pattern. The focus is on functionality and practicality rather than intricate design. While less visually striking than a high-end installation, this approach still provides a functional and attractive surface, offering a cost-effective solution without sacrificing overall appeal. This approach prioritizes affordability and practicality, minimizing material and labor costs.
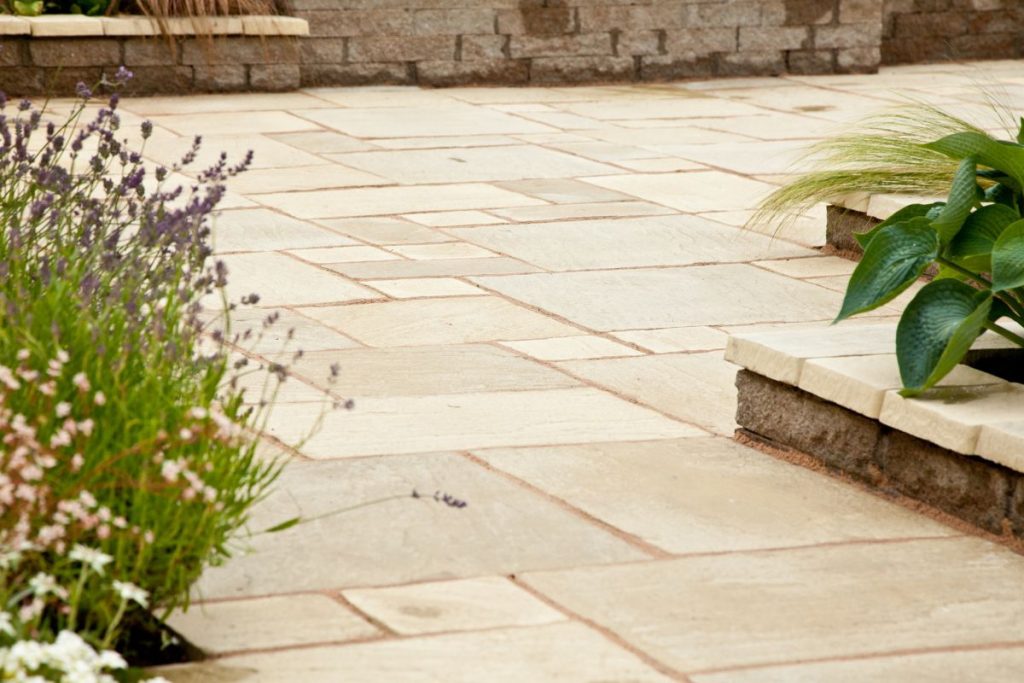
Visual Differences and Cost Implications of Paver Patterns
Source: mountviewservices.com
Different paver patterns significantly impact the visual outcome. A simple running bond pattern is straightforward and cost-effective, while more intricate patterns like herringbone or basketweave require more time and skill, resulting in higher labor costs. The choice of pattern should align with the overall design aesthetic and budget constraints.
Essential Questionnaire
What is the average lifespan of pavers?
The lifespan of pavers varies depending on the material and installation quality but generally ranges from 15 to 30 years or more with proper maintenance.
Can I install the avers myself?
While DIY installation is possible, it’s often more challenging than it seems and may lead to uneven surfaces or other issues. Hiring a professional ensures a quality installation and warranty.
What type of warranty should I expect from a contractor?
Reputable contractors typically offer warranties covering material defects and workmanship for 1-2 years. Always review the warranty details carefully before signing a contract.
How long does a typical paver installation take?
The duration depends on the project’s size and complexity, but it can range from a few days to several weeks for larger projects.
Are there any environmental considerations for paver installation?
Permeable pavers are a more environmentally friendly option as they allow water to seep through, reducing runoff and benefiting groundwater.
Comments are closed.