How To Repair Crumbling Concrete Patio
How to repair a crumbling concrete patio is a question many homeowners face. A damaged patio not only detracts from curb appeal but also poses safety risks. This guide provides a comprehensive approach, from initial assessment and preparation to the repair techniques themselves and the crucial final steps of sealing and protection. We’ll explore various methods suitable for both minor cracks and more extensive damage, ensuring you can restore your patio to its former glory.
Understanding the causes of concrete deterioration is the first step toward effective repair. Factors such as freeze-thaw cycles, poor initial construction, and inadequate sealing can all contribute to crumbling. By correctly diagnosing the problem, you can choose the most appropriate repair strategy, saving time, materials, and ultimately, money. This guide will equip you with the knowledge and practical steps to tackle this common home repair project with confidence.
Assessing the Damage to Your Concrete Patio

Source: hw.net
Before you begin any repairs, a thorough assessment of the damage is crucial. This involves identifying the type, extent, and cause of the deterioration. Understanding these factors will guide your choice of repair methods and materials, ensuring a long-lasting solution.
Signs of Crumbling Concrete
Crumbling concrete patios exhibit several telltale signs. These include surface cracks, spalling (chipping or flaking of the concrete surface), scaling (thin layers of concrete peeling off), and the overall weakening of the concrete structure. These issues can manifest in various forms and severities, demanding different repair strategies.
Causes of Concrete Patio Deterioration
Several factors contribute to the deterioration of concrete patios. These include freeze-thaw cycles (water freezing and expanding within the concrete), poor initial construction, inadequate drainage leading to water accumulation, chemical attacks from de-icing salts or other substances, and the natural aging process. Identifying the root cause can prevent future damage.
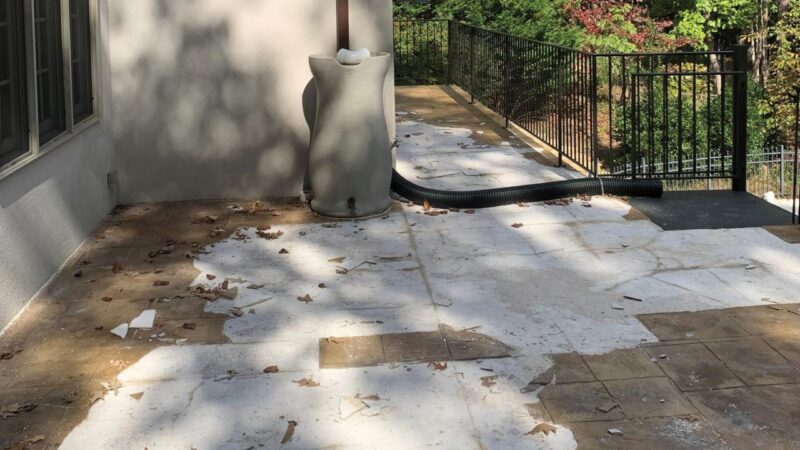
Visual Inspection of a Crumbling Patio

Source: ytimg.com
A systematic visual inspection is the first step. Use a hammer, screwdriver, and measuring tape to assess the damage. Tap the concrete surface to detect hollow or weakened areas. Measure the width and depth of cracks. Document your findings with photographs or sketches. This detailed assessment allows for a more accurate repair plan.
- Begin at one corner of the patio and systematically inspect the entire surface.
- Tap the concrete surface with a hammer to identify hollow or weak areas. A dull sound often indicates damage.
- Use a screwdriver to probe cracks and assess their depth.
- Measure the width and length of cracks and the size of any spalled or damaged areas.
- Take photographs or make sketches to document the damage.
Importance of Assessing Damage Extent
Accurately determining the extent of the damage is paramount. Minor cracks might require simple patching, while extensive damage might necessitate removing and replacing sections of the concrete. Underestimating the damage can lead to inadequate repairs and further deterioration.
Types of Concrete Damage and Likely Causes
| Type of Damage | Description | Likely Cause | Repair Method |
|---|---|---|---|
| Cracking | Linear breaks in the concrete surface. | Settlement, freeze-thaw cycles, shrinkage. | Patching, sealing. |
| Spalling | Chipping or flaking of the concrete surface. | Freeze-thaw cycles, chemical attack, poor concrete mix. | Patching, replacement. |
| Scaling | Thin layers of concrete peeling off. | Chemical attack, freeze-thaw cycles, abrasion. | Cleaning, sealing. |
| Crumbling | Deterioration of the concrete structure. | Age, poor construction, lack of maintenance. | Patching, replacement. |
Preparing for Concrete Patio Repair: How To Repair Crumbling Concrete Patio
Proper preparation ensures a successful and safe repair. This involves implementing safety measures, gathering the necessary tools and materials, cleaning the damaged area, and planning for dust and debris containment. Careful planning minimizes risks and maximizes efficiency.
Safety Precautions
Always wear safety glasses, gloves, and a dust mask when working with concrete repair materials. These materials can irritate skin and eyes, and generate dust that can be harmful if inhaled. Work in a well-ventilated area. Follow the manufacturer’s instructions for handling and using all materials.
Essential Tools and Materials
The specific tools and materials required will depend on the extent of the damage. However, some common necessities include: safety glasses, work gloves, a dust mask, a hammer, a chisel, a wire brush, concrete patching compound, epoxy, crack sealant, sealant, a mixing bucket, a trowel, and a broom.
Cleaning the Damaged Area

Source: pinimg.com
Thoroughly clean the damaged area using a wire brush to remove loose debris, dirt, and any old sealant. Ensure the surface is dry before applying any repair materials. This step ensures proper adhesion of the repair materials.
Containing Dust and Debris
To minimize dust and debris, consider using a drop cloth or plastic sheeting to cover the surrounding area. Use a shop vacuum to clean up dust and debris during and after the repair process. Proper containment keeps the work area clean and safe.
Proper Disposal of Hazardous Materials
Dispose of any hazardous materials, such as leftover concrete patching compound or sealant, according to local regulations. Never pour these materials down the drain or into the environment. Proper disposal protects the environment and complies with regulations.
Repair Techniques for Small Cracks
Small cracks can be effectively repaired using various methods, preventing further damage and maintaining the patio’s structural integrity. The choice between epoxy and concrete patching compounds depends on the crack’s size and depth.
Methods for Repairing Small Cracks
Small cracks can be repaired using epoxy or concrete patching compounds. Epoxy is ideal for hairline cracks, offering excellent adhesion and durability. Concrete patching compounds are suitable for slightly larger cracks, providing a more substantial repair.
Epoxy vs. Concrete Patching Compounds
Epoxy offers superior adhesion and strength, making it ideal for hairline cracks. It cures quickly and is resistant to water penetration. Concrete patching compounds are easier to work with for larger cracks and provide a more substantial fill. The best choice depends on the specific crack characteristics.
Applying Crack Sealant

Source: ytimg.com
Before applying patching compounds, clean the crack thoroughly. Apply a crack sealant to prevent moisture penetration and further cracking. Allow the sealant to cure completely before patching.
- Clean the crack thoroughly with a wire brush.
- Apply a crack sealant, ensuring it penetrates the crack.
- Allow the sealant to cure completely according to the manufacturer’s instructions.
Mixing and Applying Patching Compounds
Follow the manufacturer’s instructions for mixing the patching compound. Apply the compound to the crack, ensuring it is firmly packed and level with the surrounding concrete. Use a trowel to smooth the surface.
Tips for a Smooth, Seamless Repair
For a seamless repair, use a damp sponge to smooth the patching compound while it’s still wet. Allow the repair to cure completely before applying a sealant. Match the color of the patching compound to the existing concrete as closely as possible.
- Use a damp sponge to smooth the surface of the patching compound.
- Allow ample curing time before applying a sealant.
- Choose a patching compound that closely matches the color of the existing concrete.
Repair Techniques for Larger Damage
Repairing larger damage requires more extensive measures, often involving removing severely damaged sections and pouring new concrete. Careful preparation and the use of appropriate concrete mixes are essential for a durable repair.
Removing Severely Damaged Sections
Use a hammer and chisel or a demolition hammer to carefully remove severely damaged sections of concrete. Ensure you remove all loose and weakened material. This creates a clean surface for the new concrete.
Preparing the Area for New Concrete, How to repair crumbling concrete patio
Source: seattlefoundationrepairs.com
After removing damaged concrete, clean the area thoroughly. Ensure the base is firm and level. If necessary, add a layer of gravel or compacted base material to create a stable foundation for the new concrete.
Creating a Strong and Durable Base
A strong base is crucial for preventing future cracking and settling. Use compacted gravel or a concrete base to ensure stability. The base should be level and compacted to prevent settling after the new concrete is poured.
Types of Concrete Mixes for Repairs
Several concrete mixes are available for repairs, each with its advantages and disadvantages. High-strength concrete is ideal for areas subject to heavy wear, while a standard mix is sufficient for less demanding areas. Consider the specific needs of the repair area when choosing a mix.
Pouring and Finishing New Concrete
Pour the new concrete into the prepared area, ensuring it’s level and compacted. Use a trowel to smooth the surface and create a consistent finish. Cure the concrete according to the manufacturer’s instructions to ensure proper strength and durability.
- Pour the concrete into the prepared area.
- Use a screed to level the concrete.
- Use a bull float to smooth the surface.
- Use a trowel to create the final finish.
- Cure the concrete according to the manufacturer’s instructions.
Sealing and Protecting the Repaired Patio
Sealing the repaired concrete is crucial to protect it from future damage and extend its lifespan. Choosing the right sealant and applying it correctly is key to achieving optimal protection.
Importance of Sealing Repaired Concrete
Sealing protects the concrete from water penetration, freeze-thaw damage, and chemical attacks. It also helps to prevent staining and enhances the appearance of the patio. A proper sealant application significantly prolongs the life of the repair.
Types of Sealants for Concrete Patios
Several types of sealants are available for concrete patios, including acrylic, epoxy, and polyurethane sealants. Acrylic sealants are commonly used for their ease of application and affordability. Epoxy and polyurethane sealants offer superior durability and protection.
Applying a Sealant
Apply the sealant according to the manufacturer’s instructions. Ensure the concrete is clean and dry before application. Apply multiple coats for optimal protection, allowing each coat to dry completely before applying the next.
Maintaining the Sealed Concrete Patio
Regular cleaning and occasional resealing will help maintain the patio’s appearance and protect it from damage. Sweep or wash the patio regularly to remove dirt and debris. Reseal the patio every few years, depending on the type of sealant used and the level of exposure to the elements.
Preventing Future Damage
Regular maintenance, such as cleaning and sealing, helps prevent future damage. Proper drainage is crucial to prevent water accumulation. Avoid using harsh chemicals that could damage the concrete. Addressing minor issues promptly prevents them from becoming major problems.
Illustrative Examples of Concrete Patio Damage and Repair
Significant Spalling
A concrete patio with significant spalling exhibits noticeable chipping and flaking of the concrete surface. The texture might be rough and uneven, with exposed aggregate. Color variations may be present, with lighter areas indicating where concrete has been lost. The depth of the damage can vary, from superficial chipping to deeper pits and holes.
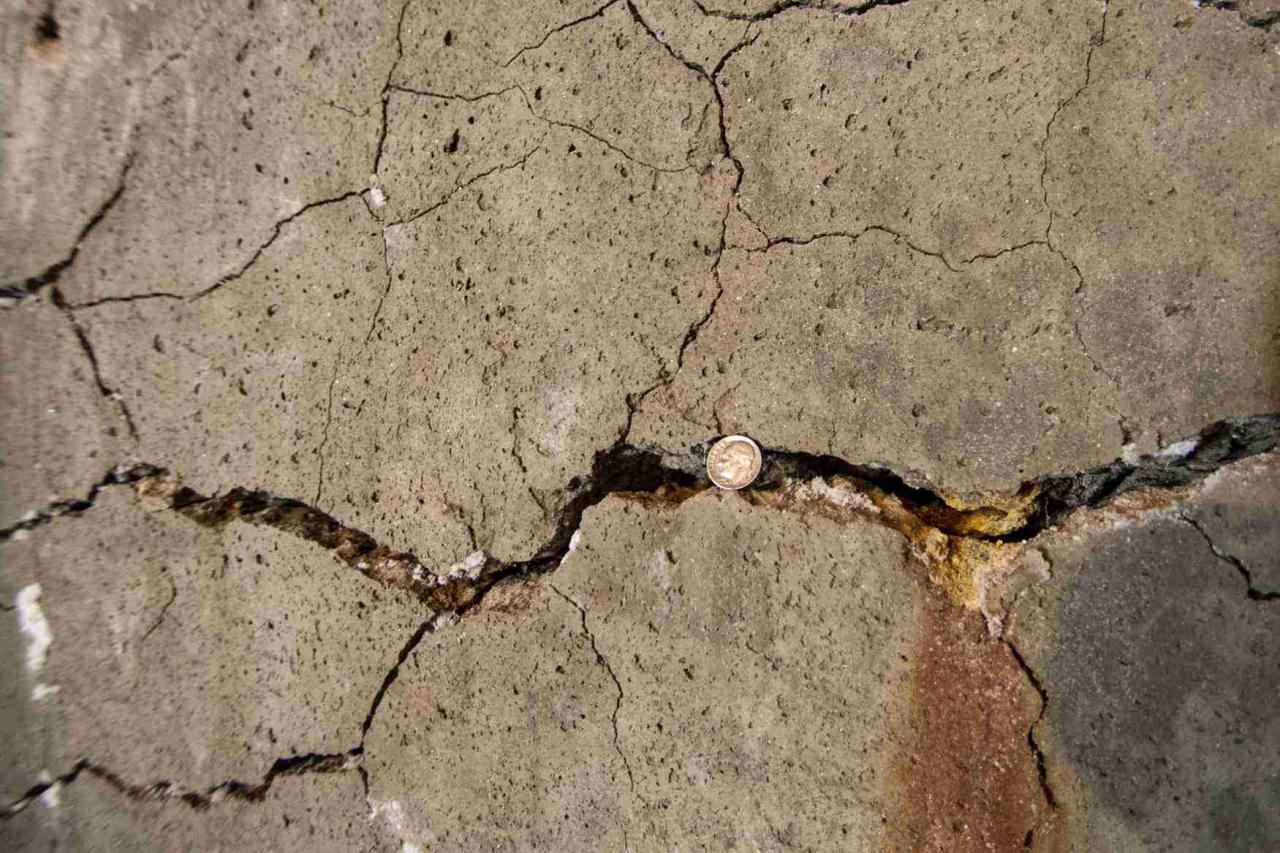
Extensive Cracking
A concrete patio with extensive cracking shows a network of cracks varying in width and depth. The pattern of cracks can be random or follow specific lines, indicating underlying structural issues. Wider cracks may be several millimeters wide, while hairline cracks might be barely visible. The depth of the cracks can vary, with some penetrating deep into the concrete slab.
Successfully Repaired Concrete Patio Section
A successfully repaired section of a concrete patio is characterized by a smooth, even surface that seamlessly blends with the surrounding concrete. There are no visible patches or color mismatches. The repaired area is structurally sound and shows no signs of weakness or deterioration. The overall appearance is uniform and aesthetically pleasing.
Answers to Common Questions
Can I repair my patio myself, or should I hire a professional?
For minor cracks and damage, DIY repair is often feasible. However, for extensive damage or if you lack experience with concrete work, hiring a professional is recommended for a lasting repair.
How long does concrete sealant take to dry?
Drying time varies depending on the type of sealant, weather conditions, and number of coats. Always refer to the manufacturer’s instructions for specific drying times.
What type of concrete mix is best for patio repairs?
A high-quality, fast-setting concrete mix designed for patching and repairs is generally recommended. Consider a mix with added fibers for increased strength and durability.
How can I prevent future damage to my repaired patio?
Regular cleaning, proper sealing, and addressing any drainage issues are crucial for preventing future damage. Consider using crack sealants proactively to prevent small cracks from worsening.
What should I do if I discover significant structural damage beneath the concrete?
Significant structural damage requires professional assessment. Attempting repairs without addressing the underlying issues could lead to further problems and safety hazards.
Comments are closed.